Friday, 8 October 2021

Unlimited Colour... With One Glaring Exception

I hate flashing lights.

In fact, when it comes to gadgets, I'll actively seek out the one that either doesn't have any lights, or has the option to turn them off.

I don't need something to light up to tell me the thing I'm using is on. If it works, it's on.

And I definitely don't need a red light to tell me something's off. What's that about? (TV manufacturers, I'm talking to you here)

Sure, status lights can be useful when setting up things like Wi-Fi routers to show if you have a good connection but after that, I want them off.

I like things clean and simple and dim.

Except Christmas trees. They're allowed to flash a bit.

This is why I love smart lights so much; for the opposite reason to everyone else - I can turn them off just by telling them to.

So why on earth would Philips send me a box of flashing lights?


It was actually three boxes; the Hue White and Colour Ambience Starter Kit, Hue Play light bars and the Hue HDMI Sync Box.

The Starter Kit won't take a lot of explanation - I think by now we're all pretty aware of what a smart-bulb is and what it can do. The Philips Hue range has a reputation for being about the most full-featured, reliable and versatile out there - with a price-tag to match. Even if you shop around for this three-bulb kit, you're not likely to get much change out of $300. However, it does include the essential Hue Bridge - the all important little white box that connects straight to your router. While some smart bulbs talk directly to your Wi-Fi, or perhaps via other bluetooth devices, Hue lights take the pressure off your home network by using the Hue Bridge to create their own.

Setup is done, of course, via the Hue app. This is very straight-forward, with one important caveat; be sure to follow the instruction about keeping your phone close to the device during setup. I didn't do this first time out and was left waiting for ages for a firmware update that never completed.

On my second, much closer, attempt, I was up and running in mere minutes.

There's not much to the Hue Bridge - a large, central button for pairing purposes and three of those annoying, blue status LED's I was complaining about earlier. There's also a blue ring around the central button to show the status of the Zigbee network (how other smart devices connect to this one) You can't turn these off at all, which is very annoying as they light up my entire entertainment unit at night with a boy-racer-like glow I never asked for. Maybe I can find a box to put over this box.

Anyway...

Once you've set the Hue Bridge up, you can add any lights you have, using the app to create rooms, download templates for different colour schemes, even connecting to virtual assistants like Amazon Alexa, Apple Home (Siri) and Google Assistant. At this point any lights you've connected can be set to any brightness or colour imaginable, which is pretty fun, especially being able to say things like, "Hey Siri, change all the lights to red."

But that's only the beginning.

Philips Hue now features Spotify intgegration. This means party lighting has become completely automatic. Simply use the Hue app to link to your Spotify account and a specially designed algorithm (isn't there always an algorithm?) creates a unique light script for each song, matching things like tempo and mood. I don't fully understand how lights can reflect genre, loudness and pitch but pretty lights change colour when your music plays, so that's cool. The best thing is, it isn't dependent on what device you're playing the music through - be it a bluetooth speaker on a shelf or your surround-sound home theatre - the integration happens through the app on your phone, so there's no extra pairing required.


Some other lights you might like to throw into that mix are the Hue Play Bars - lightweight, longer lights specifically designed for use behind TV's and computer monitors. I really appreciate the design of these bars - versatility is key. There are stands included so you can place them vertically on a shelf or the floor. Alternatively, the Play Bars come with other hardware to mount them on the wall or the back of your TV - or you can just lie them down horizontally. 

The front panel diffuses the light evenly over quite a wide area and there are long power cables that connect to a single power adapter.

In fact, you can connect three bars to one adapter... or let's really get the fun going and plug in the Hue HDMI Sync Box instead.


About the size and shape of an external hard-drive, the Sync Box has four HDMI inputs and and an output to your TV. Oddly, to set this device up, you need to install a second Hue Sync app, which integrates with the Hue network you've already created through your Hue Bridge. Confused yet? Don't let me put you off, the app will walk you through it step by step and it's not really any more complicated than pairing the Bridge was.

The idea is, instead of plugging your Chromecast, Apple TV or gaming console directly into your telly, plug them into the Sync Box instead. Then your Play Bars, (or any other Hue lights you group together) will emulate what you see on screen - and I mean exactly. I thought I was going to find this annoying and distracting but from the moment I saw it in action, I loved it and now I never want to watch TV any other way.

The goal is to create a more immersive viewing experience and Philips has achieved this trick admirably. Today I was watching a movie called, "SAS: Red Notice," which opens with a pretty full-on military attack on a village at night - guns, explosions, fire - that sort of thing. it seemed like every burst of gunfire and explosion was amplified instantly with a light beyond the screen. There's no latency at all and you can wind the brightness up or down to suit the ambient conditions. I really felt like I was inside the movie, not just looking at it.

I'm no gamer (in fact, I don't even own a console) but I imagine if I was, the immersive experience offered by the Sync Box would be worth every penny. Well... almost every penny... like everything Hue, this thing is not cheap - around $550.

And before you race out to grab one, you need to know, there is a serious flaw in this otherwise premium piece of tech - it won't work for any of the built-in apps on your TV. This is a major for me because that's how I watch Netflix, Apple TV+ and Disney Plus. The problem is there's no way to feed the video out of your telly and back into it again through the Sync Box - how annoying is that? I don't know why Philips hasn't managed to solve this with their own TV-based app or something.

You can workaround to a degree by using the mobile versions of some of these apps and running them through your Chromecast but that's not ideal. I've also had issues running several devices through the Sync Box at once. Supposedly, it will automatically select each source when they're switched on. Trouble is, most of us prefer to leave things like streaming boxes and Chromecasts powered on all the time. Yes, there's an IR receiver, so it's technically possible to program a universal remote to change sources but that's pretty fiddly. Also, many modern TV's are set up to connect to different devices in different ways - forcing up to four of them to communicate with your telly via one cable is bound to cause a few issues.

That being said, when using it as designed, one device at a time, the effect is spellbinding. 

Is it worth the $550 for the little box? And the $300 for the Hue Starter pack? (Remember, you still need that Hue Bridge to make anything work) Oh, and I almost forgot. $250 for the Play Bars? Didn't I mention that?

It's only money right? And now you've used your holiday cash for that jet ski, boat, spa, labraspoodle and air fryer, what else are you going to spend it on?


Click here for more information on the Philips Hue White and Colour Ambience Starter Kit with Hue Bridge.

Click here for more information on the Philips Hue Play light bars.

Click here for more information on the Philips Hue Play HDMI Sync Box.


Tuesday, 28 September 2021

Small and Definitely Mighty

Cards on the table time; I've never really been much of a tablet kind of a guy.

Perhaps because I grew up as personal computers were still evolving, all my inputting was via a keyboard - and by the time laptops became commonplace, keyboard and mouse was my ingrained combination. Even now, if I'm restricted to using the trackpad on a laptop, I feel a little inhibited.

Ironically, I was a pretty early adopter when it came to the rise and rise of the smartphone - so it's not as though I'm philosophically opposed to the idea of a touch screen. In fact, in an ideal world my computer offers every choice; keyboard, mouse, trackpad and touch screen - why limit yourself?

But when it comes to productivity, everyday tasks like writing, emailing and online research, I've never looked to a tablet to fulfill that role.

So the idea of an even smaller iPad with an even smaller screen... well, that just didn't make sense at all.

Turns out, 2021 continues to be my year of Apple awakenings.


The latest revelation is the iPad mini (6th generation).

I think I'm probably lucky to have entered the condensed world of the iPad mini when I have - this year's model really is a significant redesign over its predecessor. Gone are the rounded edges, instead now there's a sharper, more precise feel that matches up with the recent iPhone and iPad air aesthetic. I've been sent the Starlight version to review, which is a kind of metallic champagne colour. It also comes in Pink, Purple and trusty old Space Grey.

Gone too is the ugly (and in my view, old-fashioned) home button on the bottom chin. In fact, there is no longer a bottom chin, only a relatively narrow bezel the same size on every side. As a result, Touch ID has been enabled within the power button on the same edge as the volume controls. When used in portrait, I suppose you could call this the top edge, as that's where the selfie-camera is - although you can hardly see it. Touch ID is fabulous - fast and uber-reliable. I find it a bit strange there's no face-unlock like there is on the iPhone, although at least Touch ID still works when you have a mask on.

As inconspicuous as that front-facing sensor is, it's a more-than-decent 12MP, ultra wide-angle camera with Centre Stage, Apple's new AI feature that keeps you in the middle of the shot when you're on Facetime, Webex, Zoom or other video calls. It works very well and is especially useful if you're using the iPad mini in landscape - as the camera is then situated to the side. No matter the lighting conditions, the picture quality stays sharp and focused.

The rear camera is nothing to sneeze at either, also 12MP and capable of shooting 4K video - so refreshing to be able to take usable pics on a device like this.

At 8.3-inches, the Liquid Retina display is again quite an improvement - significantly larger than the 7.9-inches of the last model - thanks to those narrower bezels and the lack of a home button. It's a dazzlingly bright and colourful screen - a surprisingly good size for watching video on your commute or perhaps in bed at night.

Of course, it's an ideal mobile gaming device as well - small enough to hold easily but with a bigger display and a 5 core graphics engine for a more immersive experience than you'll get using a phone.

Whether watching video or gaming, both are surprisingly well enhanced by the stereo speaker array. I was really quite taken aback when watching an episode of the space-race drama, "For All Mankind" yesterday. The show features a killer period soundtrack and obviously there's a lot of cool sound-effects going on when it comes to rockets blasting off etc. I just couldn't believe the illusion of three-dimensional sound coming out of such a small device. Quite magical.

The other obvious use for the iPad mini is reading. You know... books? Or in this case, Books, Apple's own eReading app. (There are plenty of third-party eReaders too, of course) I've been reading eBooks for many years - there's nothing more satisfying than finishing part of a trilogy and being able to start the next one straight away - especially on holiday, without having to actually pack any books. While you can use a larger, standard iPad to read with, I seriously doubt many people do - especially not in bed. Again, the mini is just the right size.

In fact, for me personally, it's hard to argue the iPad mini isn't significantly more useful than a full-sized model. I find I carry it with me all round the house, most of the time leaving my phone on the coffee table instead. Yep, not only am I using the mini more than a bigger iPad, I'm using it more than my phone.

Of course, choose the Wi-Fi + Cellular version and you can pretty much use it as a giant phone anyway, although that variant is a whopping $250 more expensive. This is the kind of price jump Apple doesn't publicise much - just like the $250 leap from 64GB to 256GB of storage. I reckon that's at least a hundred bucks too expensive, especially when there's no 128GB option in the middle.

On the bright side, at NZ$849, the Wi-Fi-only, 64GB version is still an absolute powerhouse. I'm not exaggerating when I say we've got ourselves an anything-you-can-do situation when compared to the current iPad Air. In fact, in some areas it will potentially out-perform its bigger brother. For example, the mini is running Apple's very latest A15 Bionic chip - that's the same chip you'll find in the brand new iPhone 13 and a generation ahead of the Air's A14.

The more powerful chip doesn't just mean faster, smoother and more reliable performance but smarter power consumption too - always a priority when choosing any tablet. I've found the way I've been using the iPad mini, I don't just get a whole day's use from a full charge, more like several days. Thanks to the USB-C connector, charge time is pretty speedy too.

There’s even a magnetic connector for the 2nd-gen Apple Pencil, which charges wirelessly via the iPad itself. The Apple Pencil's Scribble function feels far less clumsy on the mini - this is where you can convert your handwriting to text - even when creating documents and filling out online forms. Because the mini is basically the same size as a notepad, taking actual notes this way seems a lot more intuitive than doing it on a larger display. What's more, because of the mini's superb processing power, using it as a mobile graphic art and design tool just makes sense.

Apple also offers the Smart Folio case, in a variety of colours. This connects magnetically, to protect both front and back and folds into a stand for tabletop viewing. Apple doesn't sell a specific keyboard-case for the iPad mini, although you can pair bluetooth accessories like the Magic Keyboard if you want.

Which brings me to my only real pain point, which is the same one I had right from the start; I really do not like on-screen keyboards. When I reviewed the iPad Air recently, I asked the question, "Can this device be used in place of a laptop?" Effectively, the answer was yes - but only because it was paired with the most incredible accessory I've ever encountered, the purpose-built Magic Keyboard case. With the iPad mini, a keyboard case like that wouldn't make practical sense, so you're left pairing an external keyboard - not very portable - or using the on-screen one, taking up half the display in the process.

For messaging, short emails and certainly web browsing, that's absolutely fine. But I'm sorry, there's no way I'm typing up a 1400 word tech review that way.

Wow... 1400 words? I never go that long. Ironic I'd have so much to say about something so small. Anyone would think I really like this thing.


Click here for more information and pricing on the Apple iPad mini.

Thursday, 23 September 2021

These Budget Buds are Better

When it comes to true-wireless earbuds, I usually emphasise three features above all others; sound quality, battery life and fit.

But you know what? If I had choose one of those out of the three, it'd be fit.

Here's my reasoning; if they're not in my ears, I can't hear anything anyway - and they certainly won't be using any battery.

Here's my other reasoning; I lost an earbud coming home from a party a couple of weeks ago. It fell out just as I was getting on a bus. Then it rolled under the bus. Then the driver offered to drive forward so I could find it. Pretty sure that's when he ran it over.

See how important a good fit is?

The trouble, as I've pointed out before, is not all ears are the same. In fact, no ears are the same. Not even my ears are the same. One sticks out way more than the other. From front on I look like something from a Hobbit movie.

Let's not get sidetracked.

The question is; how much do you have to pay for true wireless earbuds that won't bobble out and roll under a bus?...


Turns out, not that much. Jabra has just launched three new variants in its wireless earbud range and for the first time, there's an entry-level option, the Elite 3, starting at just NZ$115. This makes them significantly cheaper than many other "high-end" products and might leave you wondering what's been left off to get the price down.

I've been using them for a week or two now and I can safely say, not much.

The most obvious omission, features-wise, is probably Active Noise Cancelling. Manufacturers usually make a lot of noise (ironic) about the ANC abilities of their in-ear devices but often I'm left wondering how effective it really is and how much is mere marketing. Let's be frank; there's only so much you can do with a couple of tiny bits of plastic wedged in your ear holes. Unlike over-hear headsets that can physically block the majority of outside noise, leaving only a little more for ANC chips to eliminate, ear buds face a much bigger challenge in a much smaller form factor.

This is why, yet again, a firm, secure fit is more important than ever. And this is why the Elite 3 buds punch well above their weight. According to Jabra, they've scanned not hundreds, not thousands but tens of thousands of ear shapes to refine exactly how these will sit in your ears.

You know what? I think they've cracked it.

There's the usual selection of large, medium and small gel ear-tips to choose from but as usual, the default mediums seemed to work best for me right out of the box. The revelation was how far the Elite 3's slid into my ear canals with no discomfort whatsoever, yet creating the most soundproof passive noise-cancelling seal I've ever encountered on a set of true wireless buds.

This is great news for many, many reasons.

Firstly and most obviously, they don't fall out while I'm running, gardening or getting on buses.

Secondly, the key to decent bass response from the tiny speakers in earbuds is a good seal. Job done.

Thirdly, who cares about not having ANC when you can't hear anything other than your music anyway? There's hardly any noise left to cancel, that's how tight a fit we're dealing with here. In fact, Jabra still built in a HearThrough mode in case you prefer to hear things like other people or oncoming traffic. This is activated with a press of the left bud or a toggle on the Jabra Sound+ app.

When it comes to the Elite 3's, you don't even need the app at all. On iOS, setup is a simple matter of pairing from your bluetooth settings while via Android you have the added convenience of Google Fast Pair, a helpful window that pops up to ask if you want to pair automatically. Admittedly, you can only pair to a single device at once - if changing from phone to tablet for example, you'll have to unpair and pair again.

EQ options are limited - there are just six presets to choose from to boost treble or bass or enhance speech - and this you will need the app for.

However, in terms of controls there's not much to customise because there are plenty available and they're already well set up. As usual for Jabra, the on-board controls are physical, clicky buttons, making them difficult to activate accidentally. Play, Pause, Skip, Back, Answer and Mute are all there with the right number of presses but most welcome is Volume - I'm always amazed how some earbuds don't have this function on board - a long press on the right bud turns you up, long left winds things down. Again, Android users get an extra choice between voice-assistant or starting Spotify with a double press of the left bud.

Interestingly, you can use either bud by itself for a mono experience, then whichever one you use defaults to Play/Pause with a single press.

Like I say, I've used earbuds that cost hundreds more that don't offer this amount of functionality. It's crazy.

The common criticism that seems to be floating around is there's no auto pause function when you remove a bud. Talk about nitpicking. How hard is it to push the button on the bud as you take it out? Simply not an issue as far as I'm concerned.

So let's get into sound quality; am I going to claim the Elite 3's sound just as good as those much pricier options too? Not quite - not bad though.

On "El Camino Reprise" by Amos Lee and Willie Nelson, the two acoustic guitars are reproduced extremely accurately and Nelson's harmonica is hauntingly mournful in the background. Both vocalists' trademark rasps also cut through clearly but I must say, there's a slight dryness, a lack of warmth that keeps this from sounding like a perfect mix - just.

Meanwhile, on Jamie Cullum's version of "Pure Imagination" the synth-pad bass punches through with genuine force while the sweeping string arrangement shows off a rollercoster dynamic contrast. Yet again, by the end of the track, I was missing a certain something. Call it richness? Space?

I'm being super finickity here - only because the Elite 3's sound so good I want them to be perfect. A big ask for a set of buds selling for $115.

The other niggle people seem to be banging on about is the alleged "flimsy" feel of the case. To me, the lighter and smaller the case, the better. Of all the earbuds I've reviewed over the years, I've never had a case fall to bits on me and I have no reason to think this one will either.

In fact, I'd go so far as to say I really like the way the lid locks into place when it's open - I've used other cases that hardly open wide enough to get the buds in and out. Sure, I'd prefer a wireless charging option as well as the Type-C USB - but the battery life is very good so I'm not charging them that often anyway.

The Elite 3's are perhaps the most secure-fitting earbuds I've ever worn, with excellent sound quality, unprecedented passive-noise cancellation and great on-board controls. Battery life is right up there, call quality is great and they're even IP55 rain resistant. Given this is only Jabra's entry-level offering, I can only imagine what the new Elite 7 Pro and Active models have to offer.


Click here for more information and pricing on the Jabra Elite 3 true wireless earbuds.

Monday, 20 September 2021

Bring Out Your Inner Barista

If our new lockdown life has taught us anything, it's the value of little things.

Going out for a meal.

Going out for a drink.

Hell...

Just... going out.

But if there's one unifying theme that comes through loud and clear every time the promise of a lower, less restrictive level looms... it's coffee.

How many compilations of people on the street have we seen on various news bulletins where the common cry has been, "Can't wait for my first take-out coffee!"

This is, of course, entirely understandable. What could be more important than our regular caffeine hit? As someone who gets up in the middle of the night to go to work, without my morning fix, well... I don't really have a morning. The blood doesn't flow, the senses don't report, the brain simply doesn't operate.

You get it.

Having established the undeniable necessity of a decent coffee, what on earth are we supposed to do in these desperate times?

Don't you dare say, "Instant!" Don't even think it!


The La Specialista Arte from Delonghi might just be the answer to your prayers.

According to its own marketing, "The La Specialista Arte allows the coffee explorer to enjoy the art of making coffee, effortlessly." What Delonghi actually means by that statement is this is not an automatic espresso machine, spurting out perfect flat whites at the touch of a button. In fact, there most definitely will be some effort required but unless you want to pay more than twice as much, that effort is probably worth it.

Over the Summer break at the beginning of the year, it was my pleasure to review the La Specialista Maestro - Delonghi's flagship manual espresso machine. Of the many features that impressed me, two really stood out; the Smart Tamping Station and the LatteCrema System. The latter is a rather nifty automatic milk jug that magically - and instantly - heats, froths and pours the milk to your pre-programmed specifications. While the Smart Tamping Station applies the right pressure to your grind every time, without spilling a single ground.

As opposed to the Maestro, the Arte offers neither of these bells or whistles. However, all is not lost. The Arte has its own spill-free tamping method and believe it or not, there's another way to make hot, frothy milk.

But first things first; the Arte is still a classy, classy looking device. In many ways, it appears quite similar to it's grandaddy Maestro - lots of chrome, superior build quality, durable components and accessories - all the while taking up about half the bench space, which for most of us is a major consideration when choosing any appliance.

Because there's less pre-programming involved, there's much less set-up to do when you take the Arte out of the box. It's pretty much just a matter of plugging it in, filling the water tank, loading some beans into the hopper and you're good to go. 

You will have to do a few practice pours to get the balance right between the size of the grind, the dosage and the temperature - this is all dependent on what kind of beans you're using and luckily, the centrally positioned pressure gauge has a clearly marked "Optimal Zone" to help you ensure every shot (or double-shot) pours just right.

If you've had any experience with making your own espresso before, you've probably encountered the common challenge of having to over-fill the portafilter (that thing with the handle you grind the coffee into) to get anything like the right amount in there once you've tamped it down. The result is usually a pile of unused coffee grounds all over the bench - a complete waste and a total mess. The La Specialista Arte solves this problem extremely elegantly, with a hunk of rubber and a plastic ring.

The plastic ring is actually a Dosing & Tamping guide, which clicks into place on the top of the portafilter with a little clockwise twist. Then you push the portafilter into position under the grinder and your preset dosage is automatically dispensed. Thanks to the extra height of this collar-like accessory, you can now proceed to tamp the ground coffee down nice and firmly without losing any overboard. And I do mean firmly; thanks to the rubber tamping mat, you can really push down hard without causing any damage to the benchtop or the portafilter. The tamping mat then acts as a holder for the tamper and guide once you're finished with them.

I hate mess, so this is a simple, yet effective bit of design I really appreciate.

From there, it's a simple matter to clip the portafilter under the coffee outlet, place your cup (a small cup stand is also supplied) and select either Espresso, Long Black or Tea. Just to be clear, the Arte does not dispense tea, just hot water.

So, assuming you've had a bit of a play with the grind, dosage and temperature, at this point, you should have a pretty perfect shot.

But what if you're a lily-livered latte lover like me? This is where you'll really earn your barista stripes and again, don't be afraid to experiment a few times to get it just so. Using a steam wand to froth your milk does take a bit of practice but I have friends who insist on doing it themselves as it's the only way they can get it the right temperature and keep it velvety, without any bubbles.

Oh god, that sounded so snobby. But like it or not, New Zealand, we are a nation of coffee snobs and there's no doubt the La Specialista Arte provides you with all the tools to get your coffee just the way you like it - even in lockdown.

It's an attractive, beautifully constructed machine that doesn't take up too much bench space. Well designed accessories like the Dosing & Tamping guide keep the process mess-free and there's just enough automation here to keep things consistent, while you still have ultimate control. 

It currently retails for $899 - but if you shop around you'll probably find it on special and I think that's a pretty fair price. After all, if you do the maths... at a coffee a day it'd pretty much pay for itself in the time it takes Auckland to come out of a Level 4 lockdown!


Click here for more information and pricing on the Delonghi La Specialista Arte manual espresso machine.


Wednesday, 15 September 2021

The Sweet Irony of a Bluetooth Turntable

I may have told you this story before but I'm getting old and you're supposed to humour old people when they do endearing things like repeat long, rambling stories.

My first stereo was a cast-off, handed down to me from my older brother. This was back in the days when home hi-fi systems were made of glass and metal, the speakers were made of wood and were as big as beer crates. Sometimes, you'd put them on beer crates if, like me, you couldn't afford stands.

The system was a system because it was made up of different, separate components; amp, tuner, cassette deck and of course, the turntable.

That's right, kids. I'm so old, when I got my first stereo, not even CD's had been invented yet.

(Well, they'd been invented - but the only time I'd actually seen one was when I visited my cousin who must have had a very high-paying part-time job. I still remember watching, fascinated, as he inserted a Pink Floyd CD into his bizarrely small midi-system - vertically - and you could actually see it spinning around through a little glass door. "It'll never catch on," I thought to myself.)

Slowly but surely, saving up pocket money and the pay from my stand-in paper round (I delivered the Waikato Times when the usual guy was away) I built up my LP collection... "Purple Rain" by Prince and the Revolution. Billy Joel, live in Russia. Crowded House's "Temple of Low Men" on picture disc. I remember them so clearly, even after all these years.

Today, I don't even have a stereo. Not really. I have wireless smart speakers all round my house. I have a surround-sound system for my TV made up of a soundbar and a couple of bookshelf speakers. I have bluetooth headphones and true-wireless earbuds.

But nothing to plug a turntable into. Which is just as well. Because I got rid of my records decades ago. I don't even have a CD player anymore.

But now vinyl is back with a vengeance. What to do?...


The LX-310 turntable from Sony transported me right back to my teenage years, the moment I pulled it out of the box. There's a solidity to it - it's kind of heavy, the platter is aluminium, the buttons are pleasingly clunky and chunky - the lid is removable and tinted - which seems very 80's somehow.

It really does look and feel so much like my old turntable from yesteryear.

And yes, it comes with a built-in phono stage - a stereo RCA cable snaking from the rear to plug into that multi-component hi-fi system I definitely do not have anymore.

Luckily, the LX-310 is also bluetooth compatible, like just about every speaker in every room in my house. Setup takes just a few minutes - the most complicated step is removing all the bits from the box. The drive belt is conveniently taped up with a removable tab to make it simple to fit onto its bearing. From that point, it's just a matter of sliding the hinges of the lid into place (assuming you want to use the lid), plugging it in and pushing the pairing button.

This will connect it to any speaker or headset that's also in pairing mode - and you can pair with up to eight different devices, which offers quite a bit of versatility.

I first tried the LX-310 in combination with my Harman/Kardon Onyx Studio - one of the more powerful and best-sounding portable bluetooth speakers I own. In order to do this, I had to borrow some records off my daughter. Luckily for me, one of those records was "Mellow Mood" by jazz pianist, Oscar Peterson. Everything about the LX-310 is easy - the controls for Size and Speed are large and accessible and once you've set them, there are automatic Start and Stop buttons on the front of the deck, so you don't even have to place the needle yourself.

You can if you want, for old time's sake but when you're as much of a klutz as I am, why would you risk it?

Peterson's flowing, cascading style rang out powerfully and clearly. This was fun. And to be honest, a little surprising. Hi-fi snobs are always prattling on about the superior sound quality of vinyl, the argument being the modern practices of digital recording, sound compression and online streaming have squashed all the life out of today's music and the only way to really hear it as it was played live is via a needle in a groove. This argument has its technical merits, although the recent emergence of a variety of high-res streaming services is starting to take the wind out of its sails somewhat. However, it can't be denied the bluetooth technology used to connect most devices involves compressing the sound from the source, then reconstituting it digitally at the other end. So in theory, connecting a turntable to a speaker this way completely negates any advantage you gained by playing a record in the first place.

And yet...

I dunno... there's definitely something magic going on here.

Next I connected to an Echo Show - primarily because I just thought it would be really funny to be able to turn the music up and down, on and off using Alexa. It was. Still sounded really good though.

This morning, as I write this, I'm listening to my daughter's copy of "Frank" by Amy Winehouse on a set of pretty decent bluetooth headphones. This means I can hear every crackle, pop and hiss as though it's all happening inside my head... and I love it.

I don't know if there really is something magical about this analogue/digital colab Sony has put together here, or if it's just the nostalgia of sliding LP's out of their sleeves, holding them by their edges and having to get up and flip them over to listen to the other side.

Whatever it is, I haven't felt a burning desire to find something to plug that RCA cable into - not when the bluetooth scenario is just so damn convenient. In fact, the only design flaw as far as I can tell is I can't remove that cable. Seriously, I simply have no use for it.


Click here for more information and pricing on the Sony LX-310 bluetooth turntable.

Thursday, 9 September 2021

The iPad is Definitely Still a Thing

My experience with the Apple iPad has been long but third-hand.

Both my daughters attended one of New Zealand’s first BYOD schools from Year 7 onwards and that meant an iPad each. In fact, given the life-span of your average piece of tech, it actually meant two iPads each - and that’s not counting the one that got smashed on the bathroom floor one time.

This means I’ve been iPad adjacent, without really being a user, for almost a decade.

So I know basically what they do but not really how they do it.

I also know for all that time neither daughter has ever gone far without their iPad. So Apple’s doing something right.

In my brief encounters with them, you know; helping set them up, entering my credit card details so purchases can be made, trying to salvage backup information from the broken bathroom one - I always thought iPads were basically just giant iPhones and I never got the appeal.

Well, I’ve been using one for a few weeks now and I’m starting to come around…


The iPad Air (4th generation) was released in October last year and it currently sits in the middle of Apple’s iPad family; more powerful and higher-spec than a standard iPad but a little less zoopy-doopy than the top-of-the-line iPad Pro.

I could list off a long line of features that have been improved from previous generations - from the exciting range of colour choices, to the impressive A14 Bionic chip, to the equally impressive 10.9” Liquid Retina display… but unfortunately, none of that really means all that much to me because I don’t have a frame of reference. I’ve never used an iPad properly before so I don’t have anything to compare this one to…

Well… except all the other devices I’ve ever used.

So that’s exactly how I’ve gone about my review; trying to use the iPad Air for all my daily tasks, no matter how big or small.

Actually, straight off the bat, I love the colours. I’ve been sent a green one to try but there are five hues to choose between, all muted, matte, metallic and classy. Other than Apple’s own iMac, I can’t think of another tablet or computer that comes in five different colours.

The next thing I noticed was the bezel - or lack of it. Apple cops a lot of flack for the big borders that often surround its displays but on the iPad Air, the bezel is much less noticeable than the picture-frames of the past - uniform too as there’s no need for a larger chin to house the home button. There’s no home button.

At almost 11-inches, the display is quite a bit larger than on the standard iPad and is laminated with an anti-reflective coating. This means I can sit here typing quite comfortably with a window behind me.

In place of the home button, Touch ID has been built into the power button on the top side (or left, when using the device in landscape). There’s no option for face unlocking though - which in these days of prolonged mask-use is certainly not as essential as it once seemed.

That’s despite the fact the front-facing camera on the iPad Air is definitely one of its standout features. The 7MP FaceTime HD camera does a great job, providing crisp, clear, true-colour images and video - very important in the age of the online meeting. The 12MP rear camera isn’t terrible either, although I’d like a few more features and options in the camera app.

In saying that, if you’re on a video call in landscape mode, it’s kind of tricky manoeuvring yourself into the middle of the shot. This is because the selfie-cam is in the “top” bezel - which becomes the left in landscape. That means the camera ends up way off-centre and you have to hold the whole device at an angle to reframe yourself.

Why is this such an issue? 

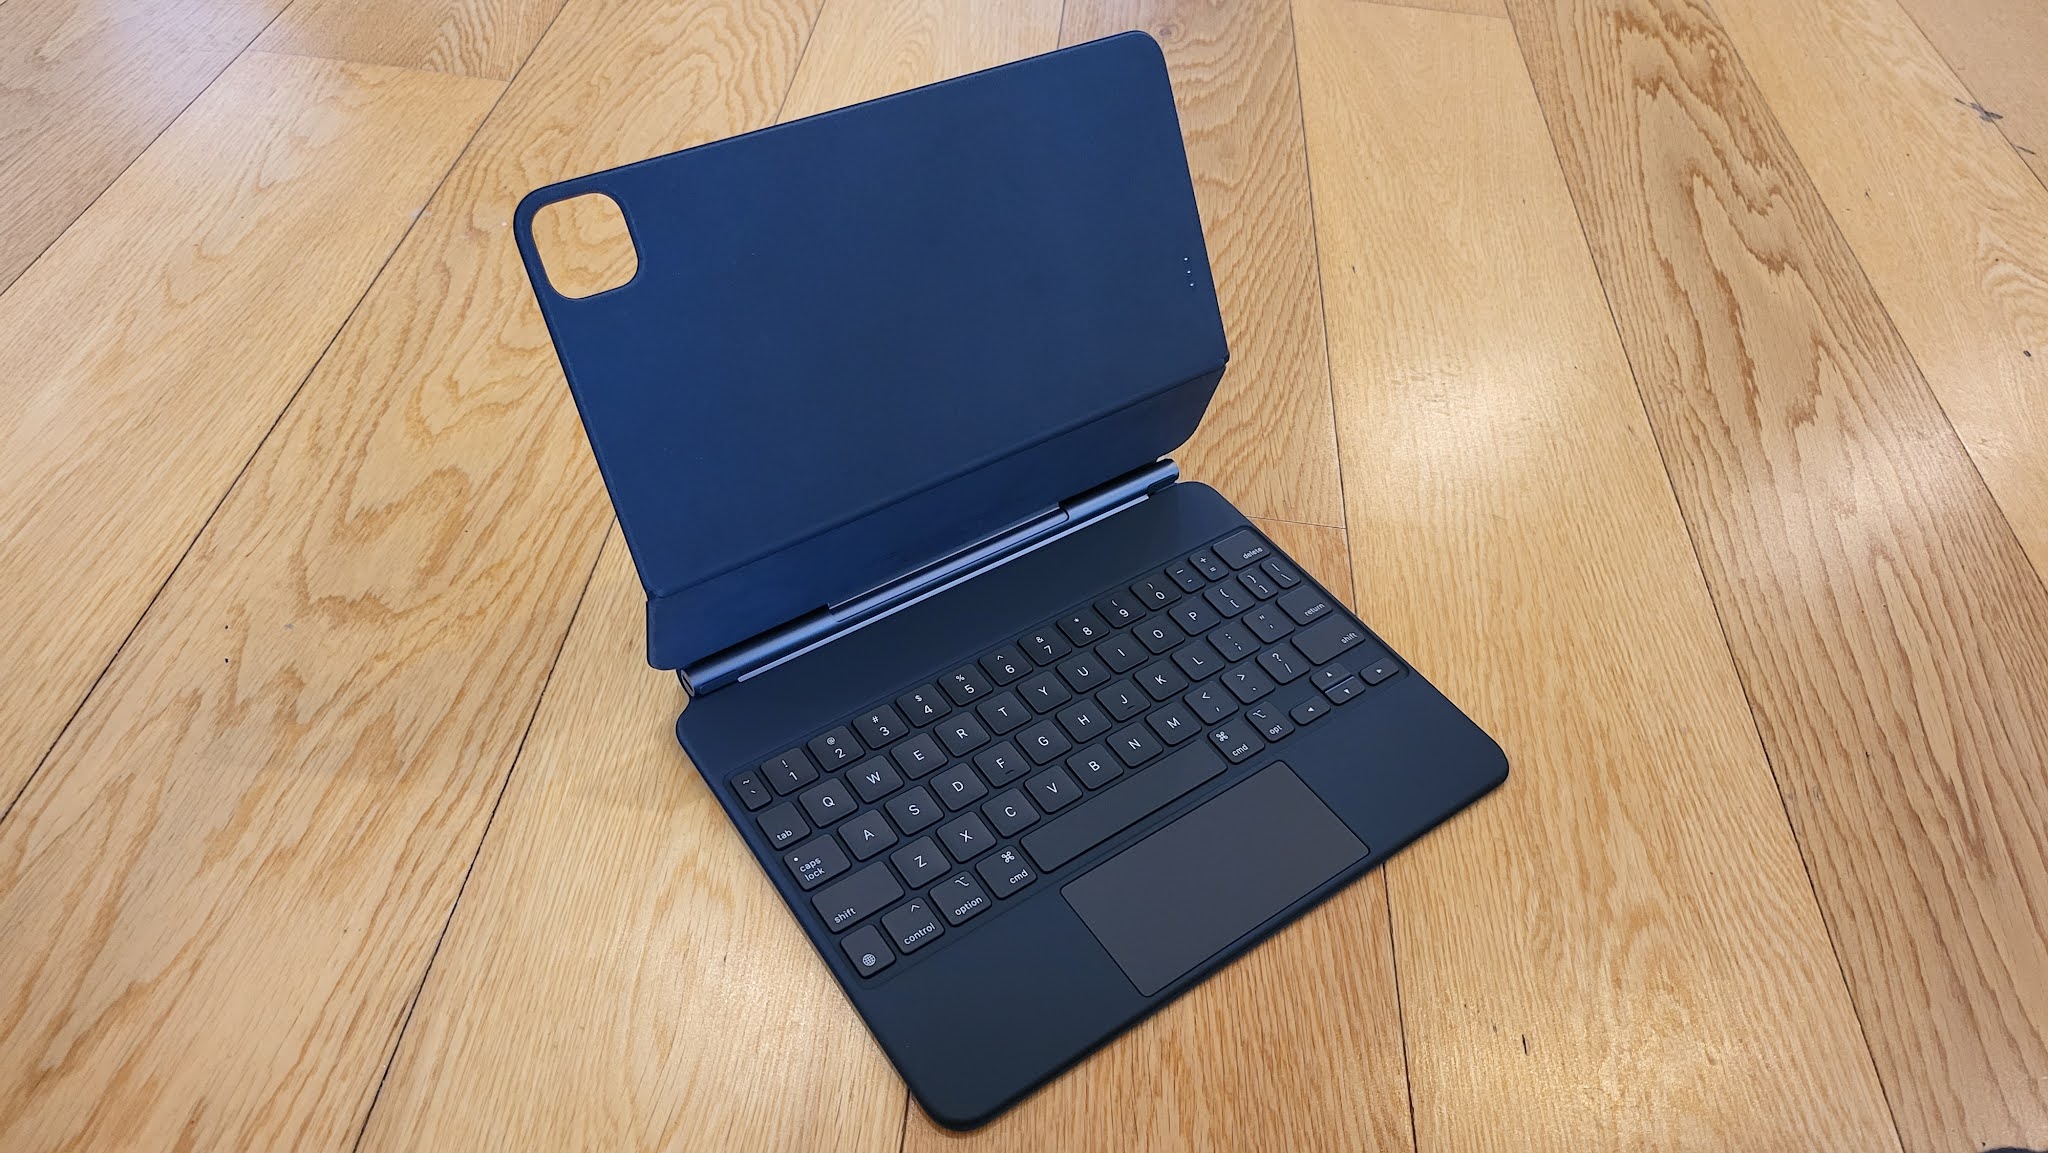
Because for 99% of the time I've been using the iPad Air, it's been attached to the Magic Keyboard. This is the evolution of the keyboard case we've seen various versions of over the years in its most sublime form. Yes, it's a sturdy, soft-touch cover for the device but that's only the beginning. 

Somehow the Magic Keyboard's unique hinge and magnet system is firm enough to hold the iPad Air in place in exactly the right angle, suspended slightly above the keyboard itself. Not only does it provide well spaced keys with impressive travel but also a small, yet fully functional trackpad, complete with satisfyingly clicky buttons.

Essentially, the Magic Keyboard converts the iPad Air from tablet to laptop, just by magnetising it on, making it quite possibly the most well designed accessory it’s ever been my pleasure to use.

And for the most part, iPadOS responds just as smoothly - both lock screen and home screen rotate to landscape, as do almost all apps.

Almost all. Which is certainly frustrating, especially now I’ve updated to the Beta version of iPadOS 15 to try out a few new features, like resizable widgets that can be added to your home screen. 

This not-rotating-to-landscape issue seems to be mostly due to app developers not making the appropriate adaptions - for instance, the app that shows me the feed from my home security cameras doesn't rotate which is particularly annoying given you're literally wanting to watch a selection of different video feeds.

But it's not just third-party operators at fault As I've pointed out - the selfie-cam is in the wrong place to work effectively in landscape mode - it should be on the long side, not the short side. What's more, if you want to take a panorama pic with the rear-facing lens, the camera app forces your screen back to portrait to perform the slow pan required for the shot. How weird is that?

Rotation issues aside, the iPad Air has proved way more versatile than I was expecting. 

My work Microsoft 365 apps open and operate seamlessly - including accessing files stored in the cloud. I've also been impressed with how functional and desktop-like most websites are. 

It took a little getting used to but I've now got my head around how iPadOS deals with with multi-tasking and multi-window operation. This involves either Split View - where you choose two apps to share the screen, either 50-50 or one-third to two-thirds - or Slide Over, which enables you to open an app in a smaller window on top of the screen you already have open. Even switching between apps is faster and more streamlined than ever.

The only thing that reminds me this is a tablet and not a laptop is not all apps are available for iPad. While Adobe does offer plenty of "lite" and mobile-specific options, more resource-heavy programs like Adobe Audition, the audio editor I use for work, just don't feature in the App Store at all.

Which is not to say the iPad Air isn't capable of some powerful stuff. I'm pretty sure I'd have no issue editing my podcasts using GarageBand - this is no longer just a kids' toy for creating short little jingles. Over the years the library of samples, effects and guest performances has grown massively, not to mention the ability to plug just about anything in to record it. There's no doubt this toy has become a powerful tool indeed.

And this is the beauty of most Apple devices - you may not be able to do absolutely everything with them but when it comes to the things you can do, all those things work perfectly, every time, all the time.

Like the new version of the Apple Pencil - the stylus designed for use with the iPad Air and iPad Pro. It pairs instantly and charges wirelessly when magnetised to the side of the device. You can swap between writing tools with a simple double tap of the pencil itself. But it's more than just a drawing device. Activate Scribble mode and you can use Apple Pencil to convert your handwriting to text - even filling out online forms, or copying, pasting and deleting text.

My favourite trick is using the pencil to snip screenshots. Just drag from the corner, and the view shifts to an editable cutout of whatever you're looking at.

Oh yes, the iPad Air keeps coming up with clever stuff - like Sidecar screensharing with your Mac. This lets you use the iPad Air as a second monitor, either extending or duplicating the display of your iMac or MacBook wirelessly or via USB-C.

The speakers are great by the way - powerful and convincing stereo when using the iPad Air for music or video streaming.

My major (and really my only issue) with this device is price. The iPad Air starts at NZ$999.00. Given everything we’ve just discussed, I think that’s incredible value. Except… what we’ve just discussed is not $999.00. It’s $2,257.00. You can get the stand-alone, Wi-Fi only, 64GB version (still in the colour of your choice) for under a thousand dollars. But add cellular capability, the Magic Keyboard, the Apple Pencil and 256GB of storage and yes, you’re paying more than double the price. Quite a bit more than double.

So let’s go through those “extras” one by one. Firstly, storage space. Phone, tablet or computer, in this day and age I’m not buying anything with less than 128GB of storage as an absolute minimum. There isn’t a 128GB iPad Air - it’s either 64 or 256. Please don’t go for 64 unless all you’re intending to do is browse and email. Which would be a massive waste of what this machine can do. So really, the price starts at $1249.00. Frankly, still reasonable (but no longer exceptional) buying.

The ability to add a SIM card will cost you another $220. That seems completely insane to me but if you’re out and about and away from Wi-Fi on a regular basis, perhaps that’s just the price you pay.

Apple Pencil? $239. Again, that seems a bit steep to me but then as I should probably have pointed out, I’m no artist and my writing is slow and terrible, so it’s not something I really have any use for. If I was a compulsive note-taker or even a professional graphic artist of some kind I get it - it’s a pretty useful tool. It’s certainly an exceptionally user-friendly design with its wireless charging and magnetic attachment.

And then there’s the Magic Keyboard. Brace yourself. $549. Look, I know I told you it’s the best accessory I’ve ever used but given you can buy a whole iPad for just twenty dollars more, I can’t explain what’s happening here.

The trouble is, for someone like me who has not traditionally been a tablet user, the Magic Keyboard, with it’s fully functional trackpad, is exactly what converts the iPad Air into the virtual laptop experience I’m finding so damn versatile as I type this. Not only is the Magic Keyboard totally great, I’d go so far as to label it an essential add-on.

At the end of it all, as far as I’m concerned, I would only purchase the iPad Air with 256GB of storage and the Magic Keyboard - grand total; $1798.00. So the question is, would I choose that configuration over any other laptop I could buy for around the same price?

You know what?… For all the portability of a tablet combined with the functionality of a notebook computer... Maybe I just would.


Click here for more information and pricing on the Apple iPad Air (4th Generation).


Click here for more information and pricing on the Apple Magic Keyboard for iPad Air.


Click here for more information and pricing on the Apple Pencil.

Tuesday, 7 September 2021

The Tag Game Everyone’s Playing

Amazing how whole product categories can just invent themselves overnight.

Well okay, with Bluetooth tracking devices, that’s not quite true. For years we’ve been watching secret agents attach “homing devices” onto things in movies and TV shows. In the same way smartwatches have given us all the capabilities any self-respecting international-person-of-mystery can access from their wrist, we can now keep an eye on our most prized possessions in real time.

Or… at least find our car keys if we’ve forgotten where we put them.

But it seems which tags you should choose might depend on which ecosystem you use…


At the end of the day, all these things are basically the same. The Samsung Galaxy SmartTag and SmartTag+ are pretty much just what you think they are; little plastic squares you can attach to whatever you want, so you can locate those items via your smartphone should they ever become lost.

However, the first and most important thing you need to know about them is they are only compatible with Samsung Galaxy devices. If you’re using something else, Galaxy SmartTags are not for you.

This is a bit surprising for me, because until recently, most Samsung accessories have been pretty brand-agnostic. Earbuds, watches - you could pair them with most late model Android and iOS devices, albeit with varying degrees of functionality.

The SmartTags break with that trend, as do the recent Galaxy Watch4 and Galaxy Watch4 Classic. Although, while the new watches will still pair with any Android phone, the Tags go that step further and keep things Samsung-only.

The only downside to this, assuming you are a Samsung-ite, is the way these trackers work is through other users pinging their locations when you’re not close enough for your phone to connect to them. That means your crowd of blissfully unaware co-trackers is restricted to other Samsung users who’re also using SmartTags. Lucky for you, Samsung sells heaps of phones - especially in New Zealand.

Of course, most of the time if you’ve misplaced your keys, wallet, handbag or security card, it’s not on the move somewhere - you’ve just put it down and forgotten where. This is when tags like these really come into their own - as the last known location is always easily found via the Find section of Samsung’s increasingly ubiquitous SmartThings app.

In fact, the new Plus version of the Galaxy SmartTag offers more ways than ever to help you visualise exactly where it is - and I do mean exactly. This is thanks to its added Ultra Wide Band capabilities. Both tags will show you where they are on a map. Then, when you’re in Bluetooth range (usually in the same house is close enough) both tags display a proximity dial on the Find screen, indicating a stronger or weaker signal as you get closer. At this point, you can activate the ringer you’ve set for your SmartTag which should definitely be enough to help you find it - even in a drawer or under a cushion. However, if it’s shut in the wrong car in the garage for example, you still may not hear it, even though you’re standing right there. That’s where UWB and AR join forces to give you on-screen directions to the super-precise location of the device… in theory.

The AR directions come in the form of arrows and a swarm of dots that coalesce around the SmartTag+ once it’s in your line of site. Except, as you can see in this picture, while my car keys (attached to SmartTag+) are clearly sitting on the side table, the AR seems to think they’re on or under the mat. I’ve tested it out quite a bit in various locations and my theory is the tags are quite susceptible to interference from other devices at close range. In this case, there’s a wireless headset with a rechargeable battery in the box under the table. I’m wondering if that’s what was throwing the little green dots off.

The point is; by that stage I was certainly close enough to see the keys anyway, not to mention the fact I could have set off the ringer and definitely heard it.

Did I mention you need a UWB-capable phone to make that AR trick work? Yes, that’s right. To utilise this example of Samsung’s latest tech, not only will you need a Samsung handset, you’ll need a really flash Samsung handset. (The new Galaxy Z Fold3 does it but the cheaper Z Flip3 doesn’t)

At $49 for the standard SmartTag and $69 for the Plus model, I can't quite see the benefit of paying another twenty bucks for some green dots and arrows. Especially when some of the best features of Galaxy SmartTags are available on both models.

For example, one of the things that really sets Samsung's product apart is the ability to program the button on tag itself - again, this happens through the SmartThings app. You can set an action for a short press and a long press - a short press could be set to help you find your phone (the opposite of finding your keys with your handset) while a long press might turn on your smart lights. That's pretty cool and you can do it with both models.

You can also customise the ringtones for different tags - from a choice of ten - but perhaps the best feature of all? The hole in the corner. This means you can attach your tag to key rings and chains without having to fork out for an extra accessory.

Ultimately, this is one of the easiest purchasing decisions you'll ever make. Once you've decided tags like these will be useful in your life the choice is clear-cut; if you don't have a Samsung phone, Galaxy SmartTags are not for you. But if you do, they're the only tag you should be considering.


Click here for more information and pricing on the Samsung Galaxy SmartTag.

Click here for more information and pricing on the Samsung Galaxy SmartTag+.