Friday, 20 December 2024

Norton Financial Monitoring - Yet Another String In 360's Bow

At the risk of sounding a bit grinchy, this time of year is when you're at greatest risk of online crime. Every online shopping transaction is an opportunity for bad actors to finagle their way into your cyber affairs, potentially swooping in to grab your personal details, security codes, bank logins and credit card information.

It's already a stressful time for many people and the last thing you need is discover some lowlife has snuck in and drained your account.

Or even worse, discovering someone close to you - perhaps an elderly or vulnerable relative - hasn't quite got the digital literacy to look out for suspicious activity online. In these cases, their stress can become your stress pretty quickly.

Now Norton has come up with a way to take some of that holiday stress away.


Financial Monitoring is a new feature under the Identity Protection section of any Norton 360 Platinum or Norton 360 Advanced subscription.

Once you're subscribed, you'll find the Financial Monitoring tab in the Identity Protection section. Here you can link to your bank accounts, credit cards, investments and loans.

Ironically, I found the setup process kind of scary. Although I knew (and double-checked) I had logged in to my account via the official Norton website, these days I'm always pretty reluctant to input sensitive information like bank logins. You can bet I was keeping a close eye on my accounts on another screen just to make sure this wasn't some kind of extremely elaborate scam.

I'm not sure how Norton could get around this nervousness - how the process of linking to your most critical financial details could feel safer.

However, in the interests of exploring the experience on your behalf, Dear Reader, I took the plunge and carried on.

All major New Zealand banks and lending institutions seemed to be represented and I had no issue completing the process.

Once I had, I could then access a summary of my account activity from any device I had installed Norton 360 Advanced onto. Although this part of proceedings isn't that different from logging onto a specific banking app, if you have multiple dealings with a collection of different financial institutions, this is certainly a great way to see all the comings and goings at a glance.

But the real peace of mind comes from the notifications Norton sends out if it detects any unusual activity. 

I'm no big-noter so it's not every day I go out and make multi-hundred dollar purchases. While you can set the threshold for an "unusual transaction" wherever you want, I decided to go for the lowest possible option, $100 for cash withdrawals, purchases and transfers.

Sure enough, when I spent an eye-watering amount at the supermarket yesterday, doing a pre-Christmas shop, I was notified shortly after about my suspicious purchase. At this point you can choose to ignore it or follow up if you don't recognise the transaction.

And just like that I suddenly had the confidence to shop online without being quite so paranoid. Given the angry, shouting woman at the self-service checkout next to me at the supermarket, it might be time to give online grocery shopping a go.

The downside is there's a bit of a delay between the transaction and the notification - but I assume that's actually the delay between me making the purchase and the digital funds literally changing hands. We've all seen how that process can sometimes take days for no explicable reason.

So taking that into account (excuse the pun) I'm now pretty optimistic Norton's Financial Monitoring service will be able to alert me to anything weird before I wake up one morning to discover I'm now a another penniless victim of online fraud. That certainly wouldn't be ideal Christmas morning - or any other morning for that matter.

It's also potentially a fantastic way to prevent the people close to you - be they elderly or just starting out - making a naïve mistake that could cost hundreds, if not thousands.

I've trusted Norton to protect my devices and my identity for years and it hasn't let me down yet. Now it's nice to know Norton is standing outside my virtual bank vault for extra security as well.


Click here for more information on Norton 360 Advanced.

Monday, 16 December 2024

JBL PartyLight Beam and JBL PartyLight Stick - Pair Some Sight with Your Sound

When it comes to heritage brands in tech, JBL is right up there.

Decade after decade, professionals and consumers alike have turned to JBL for fantastic sound solutions and in the age of portable and Bluetooth speakers, JBL has come to the party every time. Literally.

While the resulting sound performance has always exceeded expectations, I don't think anyone ever bought a JBL PartyBox specifically for its dazzling light show. 

Now, recognising it's fun to add a bit of light and colour to proceedings, JBL has taken things in a new direction.

This is the first time I've reviewed any JBL device that doesn't play music.


If the PartyLight Beam and PartyLight Stick are anything to go by, it certainly won't be the last.

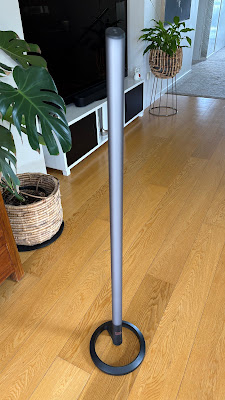
The first thing I love about these two devices is there's nothing particularly fiddly about them. The Stick couldn't be easier to assemble; you literally just twist and click the LED light tube into place on its stand, while the Beam requires no assembly at all.

The Stick comes with a USB-C charging cable in the box but no wall charger, so it's assumed you'll already have one of those lying around. It'll take up to 3 hours to fully charge the 9.0Wh lithium-ion battery which should then give you about 8 hours of continuous use.

Both lights are easy to pair, using the JBL PartyBox app. Although you don't actually need the app to use them, it is recommended you check for any firmware updates before you do. These updates take an annoyingly long time to download and install, presumably because you're only connected to your phone or tablet via bluetooth. Take my advice, don't try and install an update 5 minutes before your guests are due to arrive.

Once that's over and done with though, the rest is easy.

AFter you've plugged it in, the Beam is powered on by tilting it up to face your preferred direction. The Stick has a power button, which causes a section of colour to rise up its tube like a light-sabre, before briefly showing you how much charge is left with a white-on-black indication.

Both Stick and Beam have built-in mics and using JBL's algorithm, they listen to whatever music's playing and react accordingly.

The Stick creates all kinds of mesmerising effects, sending shafts of different colours up and down the tube at various speeds, while the Beam combines two different, extremely bright, rotating LED spotlights to project an infinite combination of colours and patterns onto your wall or ceiling.

That's fun but it's a bit random - especially if you're using both devices together like I am for this review.

Using the PartyBox app, you can customise the colours and patterns exactly the way you want but the real fireworks start when you add a JBL PartyBox into the equation.

One caveat here; it'll need to be a relatively up-to-date PartyBox - because we're about to make use of the Auracast function.

I've talked about Auracast in my recent JBL speaker reviews. It's the latest protocol JBL has adopted to link multiple speakers together so they can create a louder, more powerful sound system.

The reason the new PartyLights also have an Auracast button is to connect and sync with a speaker like the PartyBox Stage 320 I reviewed back in May. These JBL speakers put on quite a cool light show of their own, although as I said in my introduction, it's kind of limited.

Now, with a press of the Auracast button, not only will any PartyLight devices be in sync with each other, they'll also match what's happening behind the grille of the speaker (or speakers).

This instantly makes your light show look far more professional, matching the tone and beat of the music with similar colours and effects. The Beam casts very bright patterns indeed, rated to light up a 40sq/m room with ease, while the Stick is uniquely designed to cast its effects in a full 360° array.

And unlike the Beam, the Stick also has the advantage of being completely portable, so there's nothing stopping you taking the party outside - especially if you've paired it with a rechargeable speaker like the PartyBox Club 120 I used for this review.

I've often talked about my disdain for pointless flashing lights on gadgets in the past - including perhaps the token light displays manufacturers like JBL insist on building into their speakers.

However...

By adding one or more devices from the new PartyLight range and syncing them up through Auracast, suddenly it all starts to make a lot more sense. The colours and patterns being projected by either the Beam or the Stick (or in my case, Beam combined with a pair of Sticks) now mimic the PartyBox speaker's display exactly.

Unfortunately, despite how universally all JBL's Auracast speakers connect together, no matter what size or model, only the PartyBox speakers with Auracast will sync with the PartyLights and sadly, if you have an older, non-Auracast PartyBox, you'll just have to rely on the PartyLights' built-in microphones to put on the show for you.

Either way these are a quick and easy way to bring a professional standard of lighting to your party - or perhaps even your gig if you're using a PartyBox or two as a P.A. What's more, they're durable, easy to move about and are pretty reasonably priced too. Why hire lights for your next function when JBL has come up with a fun, affordable solution you can own yourself?


Click here for more information and pricing on the JBL PartyLight Bean.


Click here for more information and pricing on the JBL PartyLight Stick.

Sunday, 15 December 2024

blink mini 2 and blink outdoor 4 - Don't Pay Too Much for Home Security

When it comes to installing a security camera or two at your place, it's easy to get carried away.

A high-quality, weather-proof camera can set you back hundreds. Then, once installed, all too often you'll be stung a second time with a subscription to keep accessing the more advanced features.

Once you've spent all that money, maybe it would have been cheaper to let the burglars in and just take their pick.

The good news is - especially at this time of year - you don't have to shell out top dollar for a reasonable home monitoring solution.


From October this year, Amazon-owned Blink arrived in New Zealand in force with its latest devices, the Mini 2 and Outdoor 4. The Mini 4 offers the versatility of working either indoors or outside while the wireless Outdoor 4 promises up to two years use on a single pair of AA batteries.

Both cameras are available in white or black and both are extremely compact, although obviously the Mini 2 is particularly tiny. This makes them a good solution for those of us who prefer a more subtle approach to home security in terms of aesthetics. If you want a big, bold, in-your-face camera that shouts, "Take your chances, crims! Can't you see you're being recorded?" these Bink cams might not be the answer. On the other hand, if you'd rather not have cameras detracting from the look of your lovely home, these little beauties can be easily tucked away somewhere less obtrusive.

Both cameras come with equally petite mounts, which can be adapted for wall or ceiling installation. While these mounts are certainly versatile, they're pretty much entirely plastic and I wonder about durability over time - not that I've had any issues yet. My other concern is how the cameras simply snap onto the mount with a click. This makes for easy installation but presumably it would also make for easy theft if a baddie wanted to make off with your camera. Luckily, no video footage is stored on the devices themselves so at least the last image you got would be a closeup of the thief!

Let's talk storage, while we're here. Just like most other brands, Blink makes you subscribe to a monthly plan if you want to use their cloud storage option. Videos are saved for 60 days and it's easy to watch and share them. However, unlike some of Blink's competitors, there's another option.

The Outdoor 4 camera is boxed up with the Sync Module 2. As with many other smart home devices, instead of connecting directly to your Wi-Fi network, you use the Blink app to set up the Sync Module 2 first. This is very quick and easy and it then benefits you in three ways. Firstly, by locating the Sync Module 2 in your house, somewhere close to your outdoor cameras, you'll get improved connectivity, as Wi-Fi routers are often situated a long way away from outside, let alone where you want your cameras to be.

Secondly, connecting several cameras through a module like this means less traffic on your home network overall, which should always be your goal.

Thirdly - and this is the clincher - the Sync Module 2 has a USB-A slot to plug in an external storage drive. This means you can store your vids locally for free, even after the 30 day trial of the Blink subscription plan runs out.

The crazy thing is, the module is absolutely tiny - so it's easily stashed away behind or under furniture.

The Blink Mini 2 isn't bundled with a Sync Module and as such can just work as a standalone Wi-Fi camera - but if you're planning on using several or you want to take advantage of that local storage option, the Sync Module is the way to go and of course, you can buy them separately.

Another optional extra you may want to consider is the Weather Resistant Power Adaptor - a four-metre cord (complete with cable tidies and installation screws) that's compatible with both the Mini 2 and the Outdoor 4, if you prefer to run it off the mains, rather than on battery. This is certainly a sturdy cable and the USB-C connection to the camera is impressively rubberised to keep any moisture out. However, because the USB-C slot on the camera is extra deep in order to accomodate the weather-proof plug, I found it very fiddly to push it in at just the right angle to ensure the USB-C part of the plug actually slid in. It took me several attempts and caused quite a bit of frustration when I kept checking the app only to discover the Mini 2 still wasn't powered up and ready for pairing.

However, I got there in the end. In terms of operation, I found the cameras work in much the same way as most others I have tried. The app provides clear, wide angled footage from both cameras and the sound quality to be excellent. You also have the option to speak out of the cameras from your phone - scaring off undesirables or welcoming visitors perhaps.

The Mini 2 features a surprisingly powerful LED floodlight. This can be triggered automatically or manually via the app and it means you'll get a clear, colour HD feed, even at night. Conversely, the Outdoor 4 reverts to black-and-white infrared after dark - still perfectly clear though.

As you would expect, you can set up motion notifications to appear on your phone and being an Amazon-integrated product, you can view feeds from Blink cameras on Echo Show and Fire TV devices or set up other Alexa smart home routines to be fired off when either camera is activated. You can customise Motion Zones quite accurately or alternatively, set up Privacy Zones where the camera won't look.

There are other features, apart from cloud storage, you can only utilise through a subscription plan. These include person detection, extended live viewing and what Blink calls "Moments" - which is a compilation of videos saved into one longer clip.

Starting from NZ$5 a month, the Blink subs are similar to others out there but there are definitely savings to be made with the purchase price on the cameras themselves and their associated accessories.

The Mini 2 and Outdoor 4 are easy to set up and generally speaking, they do the same job any other camera does, yet they're probably cheaper - especially when Amazon is having one of its frequent sales. I'm not 100% convinced of their durability long-term, although really the only thing I'm basing that on is the plasticky feel of the mounting hardware. I certainly haven't experienced any issues and thanks to the Sync Module 2, connectivity is first rate.

If indeed the Outdoor 4 runs for two years on a single set of batteries, that alone has gotta be worth a try.


Click here for more information and pricing on the blink mini 2.


Click here for more information and priocing on the blink outdoor 4.

Tuesday, 26 November 2024

Apple iPad mini (A17 Pro) - Small Size. Maximum Abilities

Sometimes a product grows so successful, its brand name becomes the noun for its whole category. This is called ""generecisation."

Back in the day, although Rollerblades were just one type of inline skate, you only ever went "rollerblading."

Sellotape is just what we call it in New Zealand, no matter who actually makes the sticky-tape we've bought.

Some generecisations have become so cemented in the lexicon, I didn't even realise they weren't the original things. Doesn't Chapstick just mean any lip balm? What else are you supposed to call a Thermos if it isn't a thermos?

And even though the company itself seems to be having a bit of an identity crisis right now, when you look something up online, you're still Googling it, no matter which combination of browser and search engine you happen to be using.

Often the phenomenon of genericisation develops because the brand in question was first. Sometimes it's because it's just so much better. When it comes to iPad, it's both.

Yes, more often than not, even non-Apple tablets get called iPads. There can't be too many other examples that have been quite this dominant for quite so long.

Now, thanks to Apple Intelligence, the iPad has evolved to another level again.


The new iPad mini has picked up the AI baton and run with it, transforming itself from one of those devices you thought would be pretty useful into a must-have productivity tool.

This year's mini comes in four colours; Starlight, Space Grey, Blue and Purple with accessories like the Smart Folio cover coloured to match.

The 8.3-inch Liquid Retina display is excellent - bright, sharp and thanks to its anti-reflective coating it performs well both indoors and out. In fact, the screen is so good, I've been enjoying using the mini to watch some of my favourite shows. And it's not just the screen; the speaker array is surprisingly powerful and detailed for such a small device. When used in landscape, stereo effects are genuinely convincing.

Interestingly, although Apple has moved the selfie-cam onto the longer side for landscape use on its other, larger iPads, they've kept it at the centre of the short edge on the mini. This seems odd to me; for video chats and live vlogging don't you want the device in landscape? Perhaps the assumption is people are more likely to use the mini as a giant phone. Or at least a digital notepad.

If it's the latter, then you'll require a stylus like the Apple Pencil Pro. Just like the bigger models, the iPad mini is totally compatible, letting you magnetise the Apple Pencil Pro to its edge for wireless charging and utilising all the cool Pencil Pro features, like squeezing to open your shortcut palette and barrel-roll for adjusting the width of thicker pens and brushes.

More importantly, by combining iPad mini and Apple Pencil Pro you'll really capitalise on the new functionality offered by Apple Intelligence. Although the much-anticipated iPadOS 18.2 is still a few days away, I've been intrepidly trialling the Developer Beta version on your behalf and I can tell you, there's some pretty cool stuff on the way.

For starters, my handwriting is crude and illegible - worse than any doctor's. And yet, now thanks to Smart Script, the iPad mini takes my meaningless scrawl and converts it into something a bit tidier; still my writing but now more lined-up and evenly spaced. Of course, with the right pencil setting, you can convert script to text or use Scribble to handwrite your entries into the boxes on online forms and documents.

The Image Wand then takes that a step further still. Describe a drawing or illustration you'd like Apple Intelligence to create - maybe add a rough sketch of it too - circle it all using Image Wand (with either an Apple Pencil or just your finger) and within seconds you'll be presented with a selection of AI-generated images. You can choose one and fine-tune it even further by adding more words, perhaps a colour, an outfit or an environment.

Apart from Image Playground, Apple Intelligence stuffs plenty more tricks up the iPad mini's sleeve.

The new Calculator app can now work as a scientific calculator and it can also convert pretty much anything, different currencies, weights, distances - you name it. What's more, there's now a shortcut to Maths Notes, where you can write complex maths problems on screen and the mini will recognise and solve them for you. Kids may never need to learn how to do quadratic equations again. Brilliant.

Also, as you'd expect, there's a host of Writing Tools, starting with simple proofreading, then moving on to adjusting the tone of your messages and summarising any text you care to highlight.

And that's really only scratching the surface. Thanks to the combined power of the A17 Pro chip and Apple Intelligence, the mini has truly grown into a creative powerhouse - and we haven't even discussed what a great little gaming device it is; wonderful screen, powerful chip, first-rate sound and a dedicated Game Mode - what more can you ask for?

At first, the 2024 iPad mini seems like a pretty good deal; starting from only NZ$949. However, that's just the 128GB model. I'm not even sure I'd feel comfortable buying a phone with only 128GB of storage these days, let alone a device like this that's more than capable of editing large video files.

So once you upgrade to the 512GB Wi-Fi + Cellular version I've been reviewing, then add the Apple Pencil Pro and the matching Smart Folio cover, you're looking at - wait for it - NZ$2,217.00. Ouch. You can pick up a MacBook Air for less. Hundreds less.

Still, despite its small size it never comes up short in terms of performance, which is probably why it's an essential accessory for so many professionals, from medics to engineers to airline pilots the world over.


Click here for more information and pricing on the Apple iPad Mini (A17 Pro).

Wednesday, 20 November 2024

Twelve South HoverBar Tower and Compass Pro - The Long and the Short of It

Don't you love a great accessory?

I know I do. It's a bit like those people who have a thing about stationery, except for me, rather than buzzing about the perfect stapler, I love it when I find a quality cable that's just the right length.

Or a case that converts into a keyboard and possibly a lunchbox.

The key for me is a simple idea, well executed that makes my everyday life better.

This is something Twelve South excels at.


The HoverBar Tower and the Compass Pro are two quite different products from the Twelve South range and yet they do more or less the exact same thing; hold your device in the right place, just where you want it.


Starting with the Compass Pro, once again Twelve South has come up with an accessory that not only does its job very well but looks great too.

In a nutshell, the Compass Pro is a three-legged desktop stand for your iPad or tablet, which folds down completely for ultimate portability. It folds so flat it slides easily into the soft case provided in the box. Then it can be conveniently stuffed into your bag or briefcase so you'll have a stand for your tablet wherever you go.

There's a fair heft to this stand - it feels very durable and stable when it's all set up.

It has silicone feet so it won't slide around or scratch your desktop. There are two small brackets that fold out of the feet to hold your iPad and these are wide enough to cater for most tablets, even if they're in a case. Apart from the silicone coating on the lower part of the legs, there's also a silicone pad on the upper joint which is the third point of contact, guaranteeing no risk of scuffing your device.

The rear leg offers three different height options so you can adjust the angle at which your iPad is displayed. Extended to its longest setting, the Compass Pro converts your tablet into a secondary screen - something that's very easy to do with a Mac or another iPad - obviously you can set up your iPad in portrait or landscape to suit your viewing preference.

The middle-sized or default setting tilts your tablet up a bit more - perhaps best suited to keep you in shot for video chats.

Then a much shorter leg folds out from the main one to hold your iPad up just slightly, in a wedge configuration. This is more comfortable for on-screen typing or if you're sketching or taking notes with a stylus.

In any of the three positions, I've found my iPad stays securely in place, with no wobbling around. In fact, if you close the two front legs up a bit, the Compass Pro will happily accomodate your phone instead - again, this is ideal for hands-free video streaming on the go.

The portability factor can't be overstated here; if you're a MacBook user who prefers a dual-screen setup, adding an iPad and this fold-flat stand is about the most mobile two-screen solution you'll get.

Conversely, sometimes you just want to keep that screen in one place, at just the right height and just the right angle.

That's where the Twelve South HoverBar Tower comes in.


In many ways, the HoverBar Tower resembles a mic stand or a music stand. Actually, as a professional musician, my daughter uses an iPad Pro to display her music all the time. The HoverBar Tower can keep that iPad securely in place, in exactly the right position. Much more stable than balancing the iPad on a music stand.

I was surprised at just how tall this stand is - once fully assembled it can hold your iPad or tablet at any height between three and five feet. The assembly process really isn't much of a process at all; simply screw the three main pole sections together, screw them into the base, then add the articulating arm and iPad clip.

The spring-loaded clip is well padded and will hold any tablet up to 22cm wide, even with a case on. Thanks to its ball-shaped connection to the articulated arm it can be swivelled to pretty much any angle - so if you're wanting to use your iPad as an extra screen for your desktop setup, you should be able to get it just where you want it - even above your existing monitor (or monitors).

But just think of all the other places you use your iPad and all the times you wished you weren't having to hold it with one hand.

Stationary biking is a great home fitness solution - especially in the cold, wet winter months. Cycling apps like Zwift let you compete with other athletes from all over the world on any number of virtual courses - some real, some imagined. The HoverBar Tower is the perfect way to hold your iPad in your line of sight to keep the illusion going.

Other apps like Apple Fitness feature a wide range of home exercise classes, from yoga and pilates to kickboxing, rowing and even dance. Thanks to the versatility of the HoverBar Tower, you can follow your instructor on your iPad in any room, from any exercise machine or perhaps just the floor.

Or maybe you want you use your iPad hands-free in the kitchen, while you're following a recipe?

I know I've definitely wished I had a better way to hold my screen when streaming my favourite shows in bed. What's the point in getting all comfy if you still have to hold your iPad up with one arm? The HoverBar Tower solves that particular first-world problem in an instant.

I really appreciate the minimalist design. There are no bulky knobs to loosen or tighten the articulating arm - the joints are pre-set at just the right firmness to be easily adjusted while still staying firmly in place once you've got your iPad in the optimum position.

And yes, like the Compass Pro, the HoverBar Tower can also accomodate a phone if you'd like to use it as a tripod for your selfie videos. The base is wide enough to offer excellent stability, yet not so heavy you can't easily move the stand from room to room if need be.

Neither of these two stands are revolutionary - we've all seen similar ideas before. Yet what Twelve South has done with those ideas is the epitome of elegance and refinement. Each product identifies a problem and solves it effectively with a minimum of fuss and for me, that's what great design is all about.


0


Wednesday, 13 November 2024

Apple Intelligence - Better Late Than Never

I'm so sick and tired of AI. Which is a bit of a problem given AI has been the focus of pretty much every single tech launch this year.

I wouldn't mind except for the hype.

We keep being told AI is the answer to all our prayers. It'll boost our productivity. Give us more free time. Answer all our emails and make our dinner reservations for us.

Unfortunately, from what I've seen so far, most people seem to use it to generate funny pictures, compose terrible music and answer questions they could have figured out themselves with a basic Google search.

And to compound the issue, every day it seems like there's a different story about how AI got something wrong. Really wrong.

All that being said, it can't be denied there seems to be a big demand for AI and many have been surprised at how long it's taken Apple to roll its version out.


Well, the wait is almost over. In New Zealand, with the iOS 18.2 update in early December, compatible Apple devices will finally become sentient. Well... you know what I mean.

You may or may not be aware that before leading up to a big iOS update, Apple releases Beta versions users can try at their own risk to help iron out any last minute bugs before the more public release. Even before then, there's a Developer version (or more often, several developer versions) primarily to allow app makers to test their own updated products in the new environment.

Over the last week or so, I've boldly jumped into this experimental universe in order to try out the forthcoming suite of Apple Intelligence features on your behalf. Some are so silly they don't interest me at all. Some are so good, they're scary. Many are just Apple's version of existing features we've already seen from other manufacturers and a few have become essential tools for me that I now use pretty much every day.

While it's easy to think of Apple Intelligence as just an iPhone thing, it's also coming to the M1 and later iPad Airs and iPad Pros, the just released A17 iPad mini and any Mac powered by an M1 chip or later.

Right now there are just six iPhones that'll run it; last year's iPhone 15 Pro and Pro Max and all four 2024 iPhone 16-series handsets. This is because unlike a lot of AI out there, a big chunk of Apple Intelligence happens on device, using the Neural Processor (NPU) built into the latest "A" or "M" chips.

Not only does this mean a more integrated, faster and smoother response from any AI functions but it also guarantees a better degree of privacy, something Apple seems to prize more highly than many of its competitors.

Even when Apple Intelligence needs to access larger, server-based models for more complex tasks, Apple has assured users its Private Cloud Compute protocols mean your data is never stored anywhere except on your device.

What I've noticed so far with a lot of the new features is many of them aren't all that obvious, even when you're using them. For example, the new Clean Up tool in the photos app just appears as another editing option. This is for when you need to remove something from your shot, like that photo-bombing bystander in the background. In many cases, Apple Intelligence will identify what you're trying to do automatically as soon as you press the Clean Up icon. If not, you can do it manually as I demonstrate in the video below.

The question is, is this an AI feature, or just a photo editing feature? Who cares? It works pretty well and you don't have to go hunting through a special AI menu or app to access it.

In fact, although the new-look Photos app took a lot of iPhone users by surprise when it appeared in iOS 18, the way you can now use Apple Intelligence to search your library for certain people, locations and other things - perhaps to create your own instant album or montage - is a smooth and seamless evolution.

The same can be said for Siri. In fact, you could argue Siri has always been a form of AI but now it's really been levelled-up, taking more notice of the context in which you're using it. Things like where you are and what apps you have open will affect Siri's responses and thanks to Apple's ever-increasing compatibility with more and more IoT devices, I definitely feel like I can depend on Siri to run my smart home more effectively than before.

There are still some inconsistencies. Ask Siri to take a screenshot? No problem. Ask Siri to start a screen recording? It refers you to the Apple website. How weird is that? At least you can now use text prompts to talk to Siri by double-tapping the bottom of the screen.

Another integration feature brings two AIs together. In the new Apple Intelligence menu you can toggle on Chat GPT to work with Siri, even signing into your Chat GPT account if you have one. I love this kind of cross-platform collaboration and I look forward to more of it in the future.

Writing Tools is going to save a lot of people a lot of time. Basically, anywhere you use text, Writing Tools can help you proof-read, summarise and even suggest small changes to change the tone and style of what you write.

This works hand-in-hand with other features like Visual Intelligence, which makes recognising and capturing text with your camera easy - even translating and reading it out loud if you want.

Of course, an AI isn't an AI unless you can use it to create silly pictures and yes, Apple Intelligence comes to the party here too. Image Wand utilises the power of Apple Pencil to turn your rough sketches into professional illustrations. On the other hand, Genmoji is just a way to create your own, bespoke emojis. I never use emojis, but I'm sure it's great. (Insert boomer joke here)

Image Playground is perhaps the most creative way to use Apple Intelligence - whether you use existing photos or drawings to create new enhanced concepts or simply describe an image to bring it to life.

But probably my favourite of the new Apple Intelligence features is the way both emails and notifications are now organised and prioritised. I'm not usually very trusting when it comes to letting AI decide what I need to deal with now and what can wait till later but even I have to admit, not having to sift through a dozen press releases from PR companies and today's great offer from Nespresso in order to get to my actual work emails has been a godsend.

And that's just a taste. Every day I'm discovering more tweaks Apple Intelligence can make to the way I use my phone, my Mac and my iPad - in many cases it was so well integrated I didn't even realise it was happening at first... and that's just the way I like it.


Click here for more information about Apple Intelligence.

Monday, 11 November 2024

Swann SwannBuddy 4K - Subscription Not Compulsory

I've reviewed a fair few video doorbells in my time.

In fact, it's got to the point these days I feel a little sympathy for the couriers who come to the door. I wonder if they do a bit of a double take when they go to press the button and it's not the same button as the day before?

Who am I kidding? Couriers pick up and deliver hundreds, if not thousands of packages every day - as if my front door is going to stand out.

Still, I can't help imagining the conversation back at the depot; "You ever been round to that Hart guy's place? I swear he's had three different doorbells this week."

Of course, what they don't know - at least I hope they don't - is some of those video doorbells are a lot more useful than others.


To begin with, the SwannBuddy 4K is a very capable security camera, before you even get to the doorbell part. As the name suggests, you'll get extremely clear, zoomable 4K footage in full colour. You may not think that kind of video quality is essential but take it from someone who knows; if you want to post identifying tattoos on social media to identify the thug who stole your package, the clearer the better. (It'll be pretty helpful for the police if they decide to show up too.)

The 165° vertical viewing angle and the 1:1 aspect ratio ensures you'll capture pretty much every corner of the average entranceway, from floor to ceiling, although there is a considerable amount of wall-eye distortion around the edges.

As you'd expect, setting up the SwannBuddy is very straightforward, with the Swann Security app guiding you through every step. If you already have other Swann cameras in operation, the feed from the doorbell will simply be added to your dashboard. I'm not sure about other smart home ecosystems but I discovered there's a Swann Security skill that can be added to Amazon Alexa, although the SwannBuddy will only appear as a camera, not a doorbell, which is a shame as you can't create a routine for what happens when the button is pressed.

On the other hand, there's a wireless chime unit included the box, powered by two AA batteries. This is easily paired with the SwannBuddy, can be placed pretty much anywhere around the house and has six different chime options - from common bell sounds to barking dog and cuckoo clock sound effects. If you have a larger house, you can purchase extra chime units, pairing up to five with a single doorbell.

The SwannBuddy itself runs on a built-in 6500mAh lithium battery - quite a large cell for a device like this and it can last up to three months before you have to take the doorbell down and spend a few hours recharging it via its USB-C port. Although this is a bit of an inconvenience, the supplied wall bracket is sturdy and well designed. Simply loosen the security screw at the base and the SwanBuddy lifts off easily. Alternatively, you can hardwire it in if you're replacing a mains-powered doorbell.

Like other similar devices, once set up, you can customise which specific area you want to monitor as well as the sensitivity of the True Detect heat and motion sensor. You can also set schedules for Home, Away and Night modes and these modes can be quickly accessed and changed manually via home screen widgets for both iOS and Android devices.

None of this particularly sets the SwannBuddy apart from other, similar devices - although I will say I quite like the robust look and feel of the device and because the centrally-located button lights up around the edges when it detects motion and starts recording, there should be no confusion for visitors when it comes to figuring out which bit they're supposed to press.

Where the SwannBuddy really stands out is how many features you get before having to invest in a monthly Secure+ subscription.

Let's start with storage. Not only is there a microSD slot tucked away behind the weather-proof flap at the back, you'll find a 32GB card already in there, when you take the device out of the box. Admittedly, this isn't the most secure option should someone decide to rip your doorbell off the wall, although I've never heard of that happening. Even if it does, you get 24 hours of rolling cloud storage as a backup. This "free" feature alone is a compelling reason to consider the SwannBuddy.

As you'd expect, you can communicate with your visitors via the app in real time. But what if you're not around and you're too busy to let the courier know they can just biff the package over the gate because it's not fragile?

That's when you can let the SwannShield AI Voice Assistant speak for you. This isn't just a selection of pre-recorded quick replies - although you can use them too. SwanShield is much more clever. When you're in Away or Night mode, you can set SwannShield to be Polite, Assertive or Disinterested. Then, if someone rings the bell and waits for a response, SwannShield will talk to that someone as if it's a resident of the house, giving the impression somebody's home - or at least closely monitoring the camera. 

I've tried it out and it seems to work, although unfortunately, the SwannShield AI only speaks with an American accent. I note this feature is still in "Beta" and I'd definitely like to see the response time reduced and I'd also like to hear the AI's voice on the captured recordings. In saying that, there's a full transcript of any SwannShield conversations available on the app within seconds of them finishing.

Pretty clever stuff and all yours, free of charge.

That's not to say there aren't significant benefits to subscribing to Secure+ - longer cloud storage, package, pet and vehicle detection, rich notifications with thumbnail previews and even free replacement in the unlikely event your SwannBuddy does get nicked - just some of what your sub gets you.

However, with easily accessible and shareable local storage and the SwannShield AI Voice Assistant, there's no doubt the SwannBuddy 4K offers some of the best value, subscription-free features around.


Wednesday, 6 November 2024

Amazon Kindle Paperwhite Signature Edition (12th generation) - Icing On the Cake

In some ways, this review will be quite challenging.

Today I'm featuring a device that has been upgraded... but not much. In saying that, it was already pretty great device. The trick will be figuring out if it's been made much greater.

In other ways, this will be an easy review... because I've pretty much already done it once before.

So I'm going to cheat.


For today's Amazon Kindle Paperwhite Signature Edition (12th generation) review, I'm going to go through the features I outlined in my previous review of the 11th generation - from December 2021.

Let's start where I started then; with the screen itself. This is a genuine upgrade. Not only have we gone to a full 7-inch display, up from 6.8-inches but the contrast ratio is Kindle's best yet, meaning the black bits are blacker than ever. Great news for people like me who prefer to use dark mode.

Just as before, there's still an auto-sensing front light so you can carry on reading in the dark. Conversely, the screen is still also anti-glare, which is essential for when you're reading out in the sun.

Although Amazon claims there's a much more powerful processor, promising 25% faster page turns, this isn't something I've particularly noticed or been able to verify. To be honest, the pages on the previous generation turned plenty fast enough for me.

Oddly, there's been no storage increase. You still get 32GB which doesn't sound like much in smartphone terms but given your average eBook is only about 2 or 3 MB, you're unlikely to use it up any time soon.

Like the Gen 11, the Gen 12 Signature Edition can charge via both USB-C and wirelessly - although, if you don't opt for the bespoke Kindle charging stand, it can be a bit fiddly getting your charger in exactly the right place.

Apparently, there's been a significant increase in battery-life but I have no idea how to test this. Amazon says you should get around twelve weeks use on a full charge. Does that mean 30 minutes reading a day? Or four hours? See what I mean? Rest assured, the battery lasts a very long time indeed.

And yes, this Kindle is also waterproof, making it your ideal beach or poolside companion.

That's one of my greatest arguments for using an eReader instead of traditional books by the way... Ever dropped a book in the pool? Good luck reading it after that. 

The easiest way to download books to the device is still via the Kindle Store, although these days there's a very simple-to-use desktop app called Send-To-Kindle. You can use this to drag any document or book onto your device. There's even a web-based version, so it couldn't be easier.

Seriously guys, by this stage I hope I'm not still having to convince you eBooks are so much better than old, heavy, (potentially soggy) "traditional" books. Think about what I just said. As long as you have Wi-Fi, you have access to just about every book ever written. Finish one of a trilogy, start the next one right away. All the while taking up almost zero space in your luggage.

Admittedly, the minor improvements I've outlined here are not really enough to justify upgrading if you're already using the 11th Generation Paperwhite Signature edition. But if you have a lesser device or even worse, no eReader at all, then this is about as good as it gets.

For those of you into graphic novels and Manga, Kindle now offers the Colorsoft - Amazon's first colour Kindle - although I'm yet to try it so can't recommend it with any authority. The entry-level Kindle has also been updated this year, as has the Scribe - the Kindle you can write on.

But for me, the Paperwhite Signature Edition has been the only eReader I ever needed - until now. Now the Paperwhite Signature Edition is STILL the only eReader I ever needed, just a bit bigger, a bit faster, with a slightly nicer screen and a much better battery.

Oh... and if you're after a case for it, there's a lovely leather one I can recommend. When I first took it out of the box I was impressed by how genuine the "leather" felt. I then tried to discover exactly what it was made of, because it really did feel like leather. Eventually, after squinting at the fine-print on the side of the box, I discovered it was in fact, 100% leather. Like, for real.

I then proceeded to accidentally scratch the cover somehow. Multiple times, really scuffing it up. At first I thought, "Damn, that looked so cool." But after a week or two of daily abuse, I look at the well-and-truly worn-in leather and think, "Damn, that looks cool."

See? Just because Kindles are a new way of reading, doesn't mean they can't still be vintage.


Click here for more information and pricing on the Amazon Kindle Paperwhite Signature Edition (12th generation).